Hi Kyle,
We are high school students located in Brazil and we are developing a fogponic system inspired by your automated hydroponic design. We have bought all the materials necessary to add the automated part to our fogponic system but we are having some difficulties figuring out the sensors. Some of our sensors are of a newer model thus the images and explanations you have on your site aren’t really applicable to us.
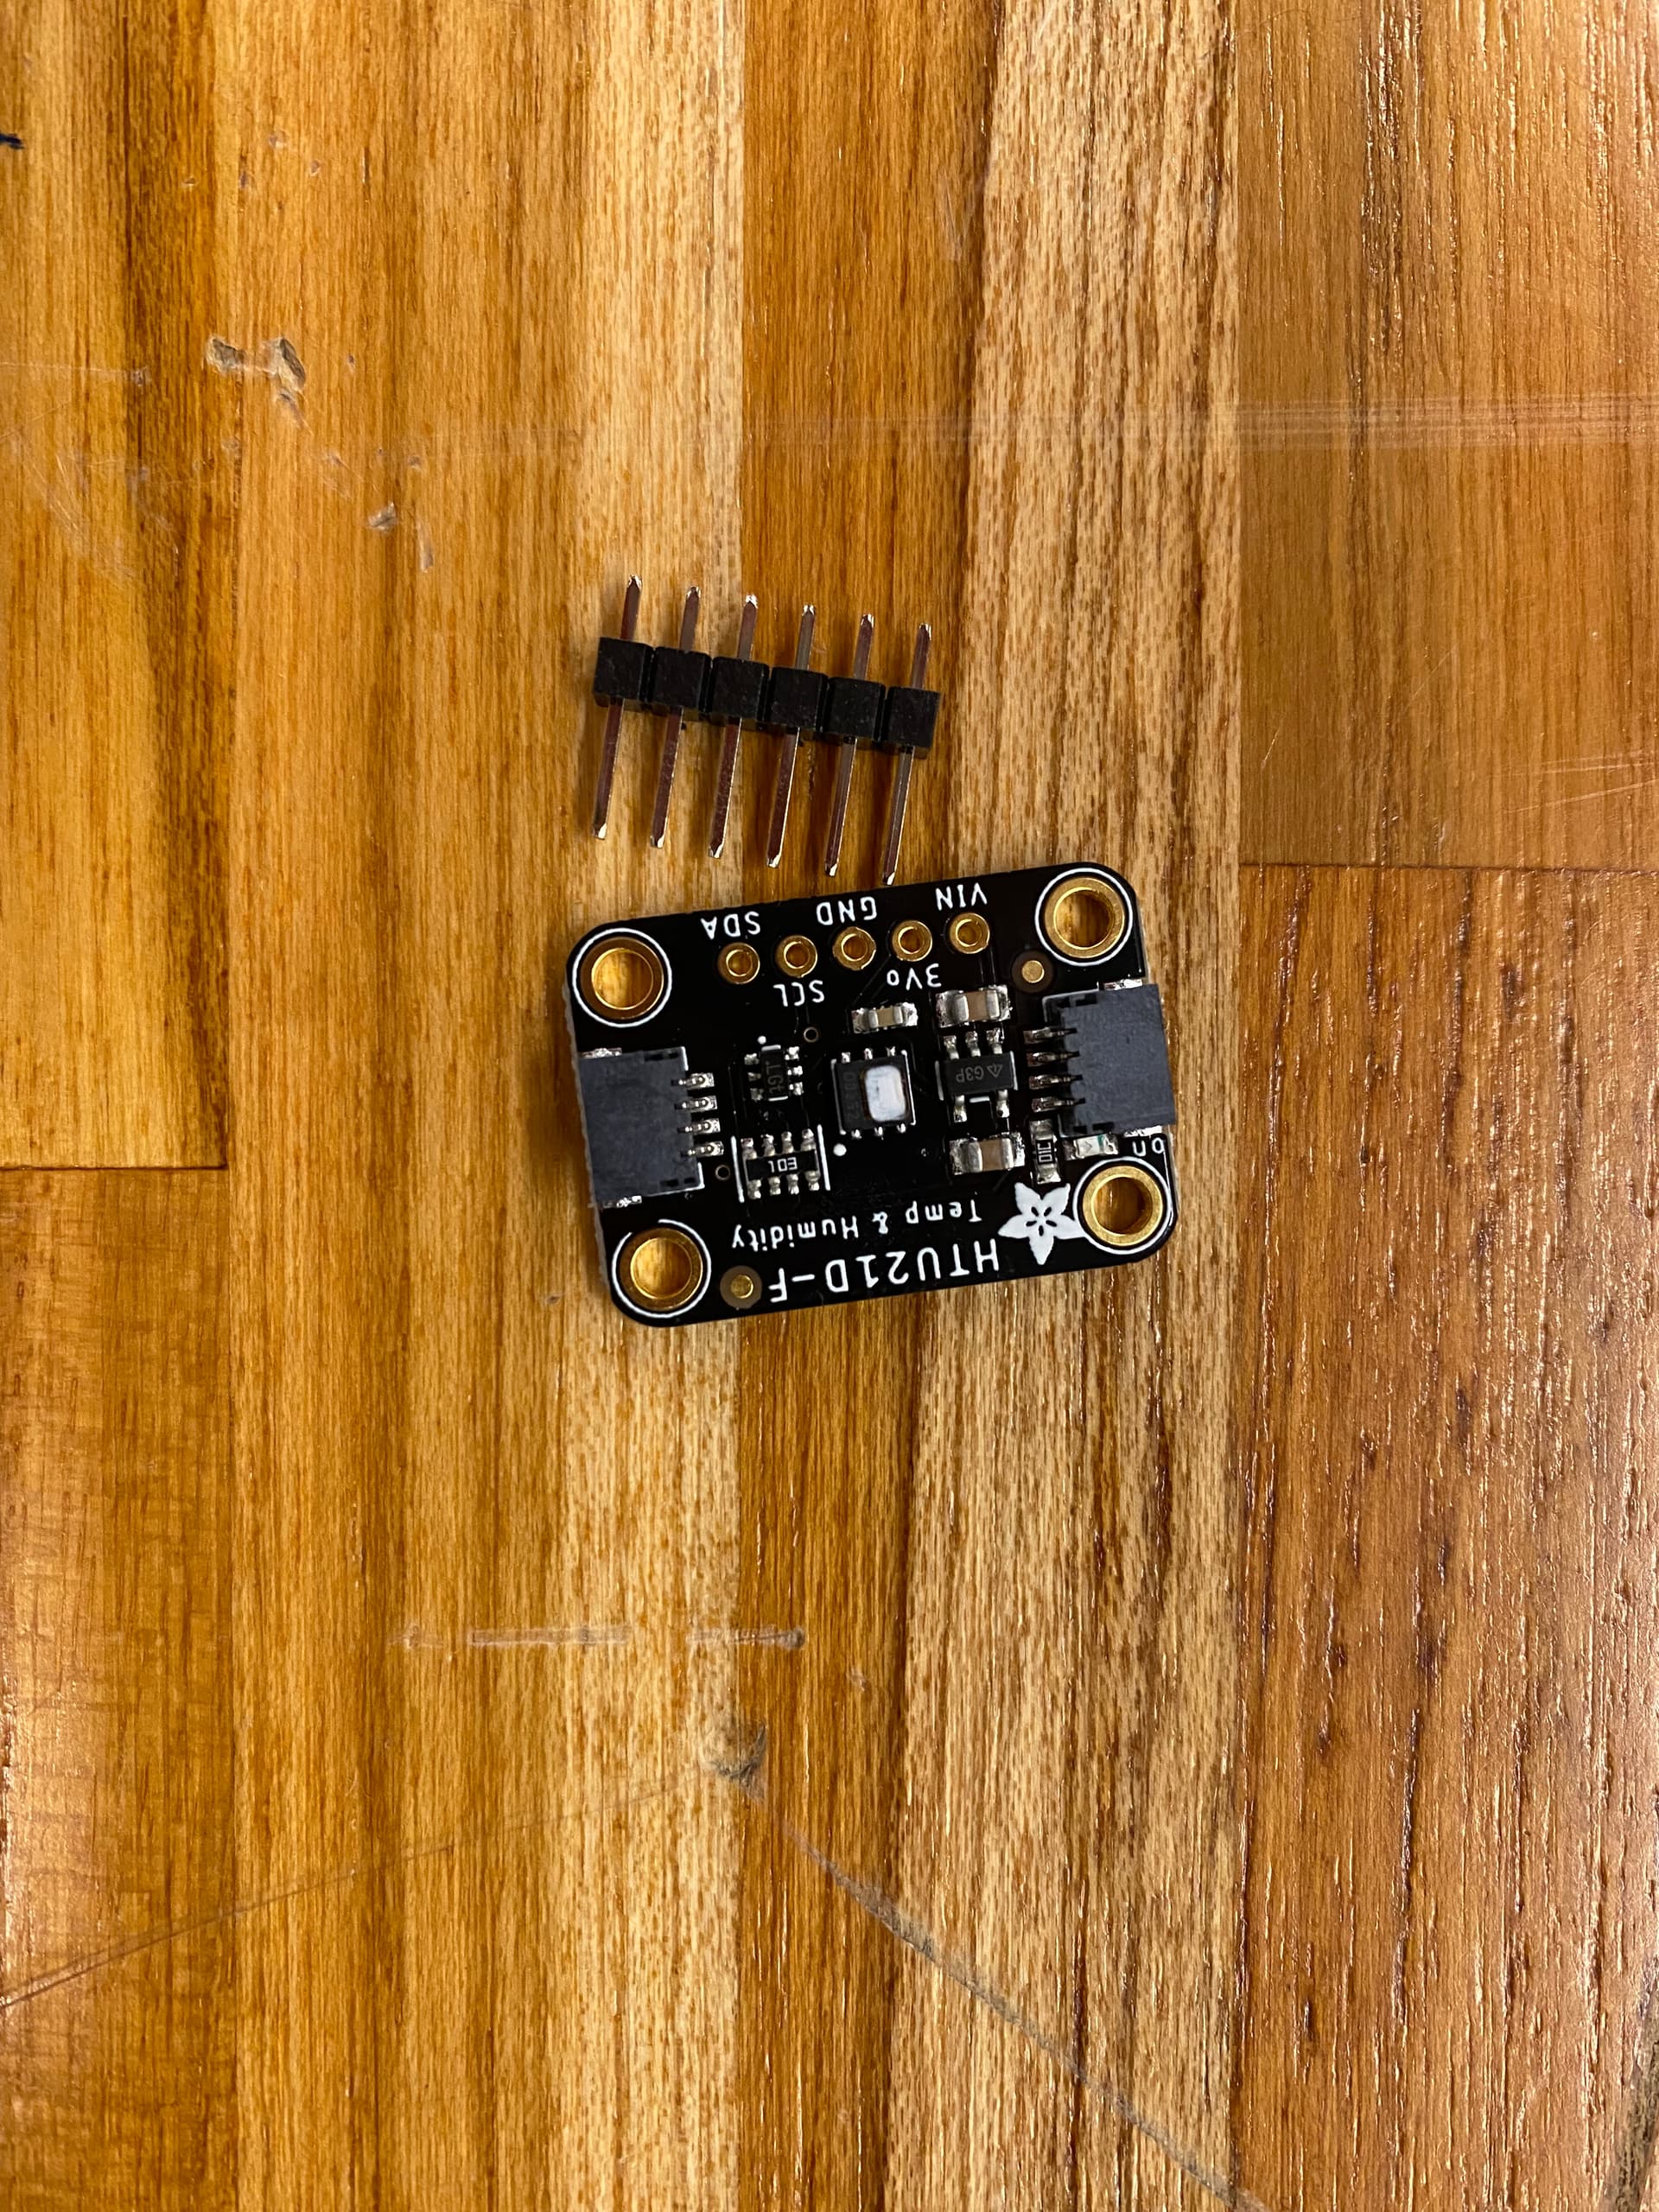
The sensors/boards we are having problems with are: an Atlas Scientific carrier board as it came by itself and we do not know which sensor to connect it with (doesn’t seem to be in your build guide video); the Atlas Scientific water temperature sensor as it came with two pieces, one connected to the sensor and one that isn’t, and we do not know how to connect the other piece to the sensor; the Adafruit temperature and humidity sensor mini-board, as it came by itself and we do not know if it should be connected to another board and where exactly in the build it should be located.
Thanks