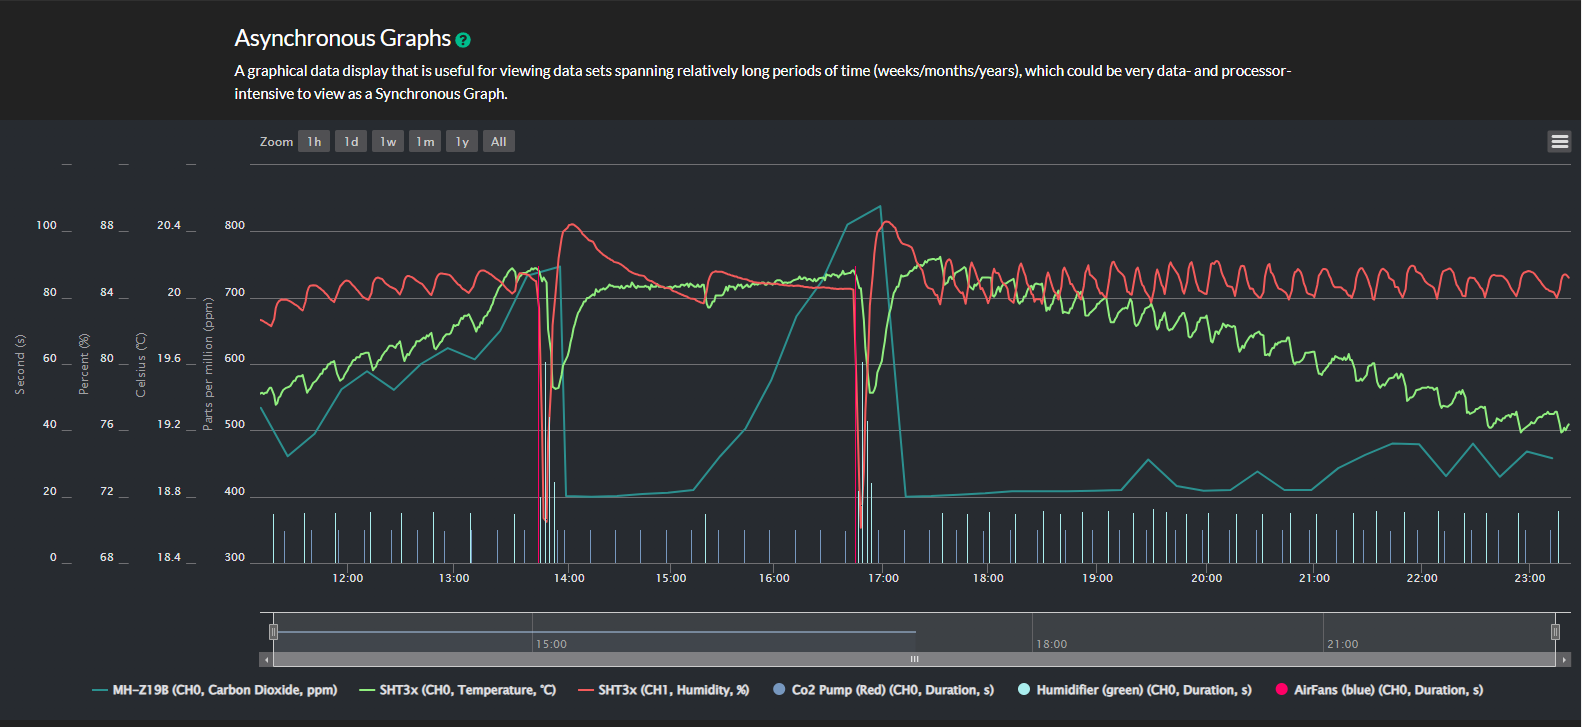
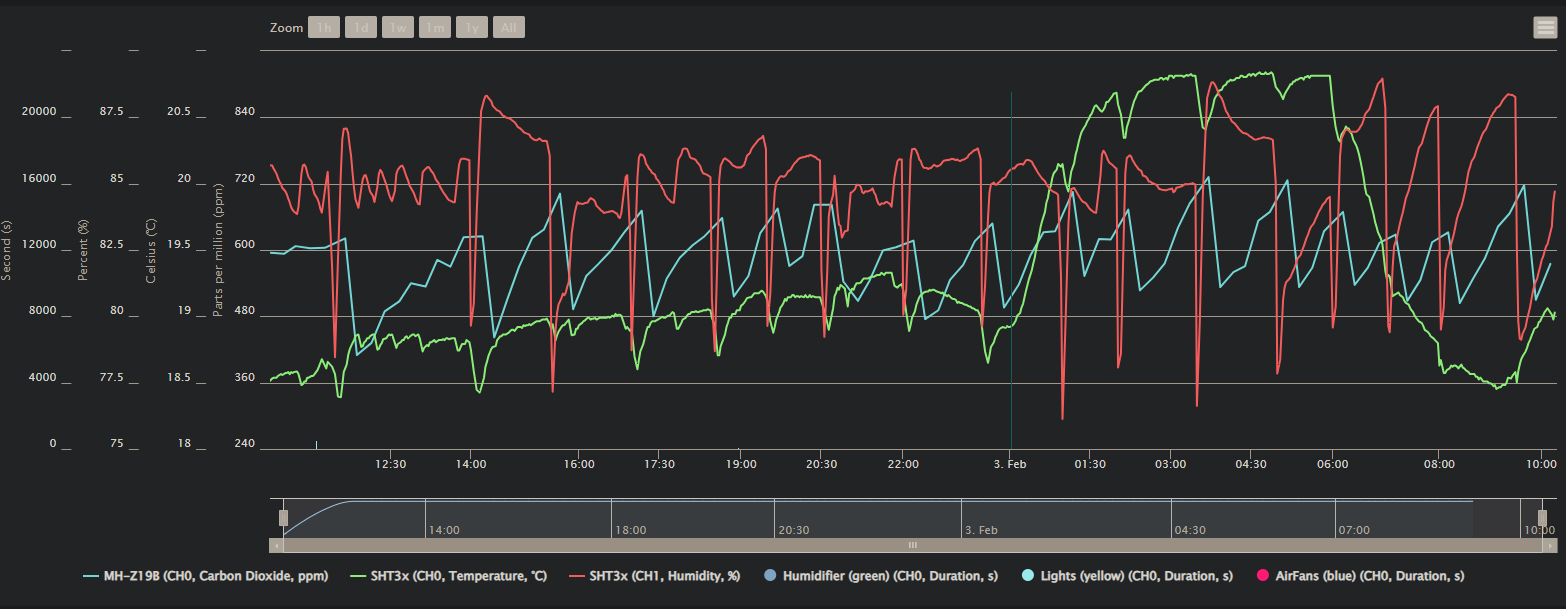
This image fills me with joy. After struggling with the SHT-30 sensor for a few weeks I’ve finally got it stable.
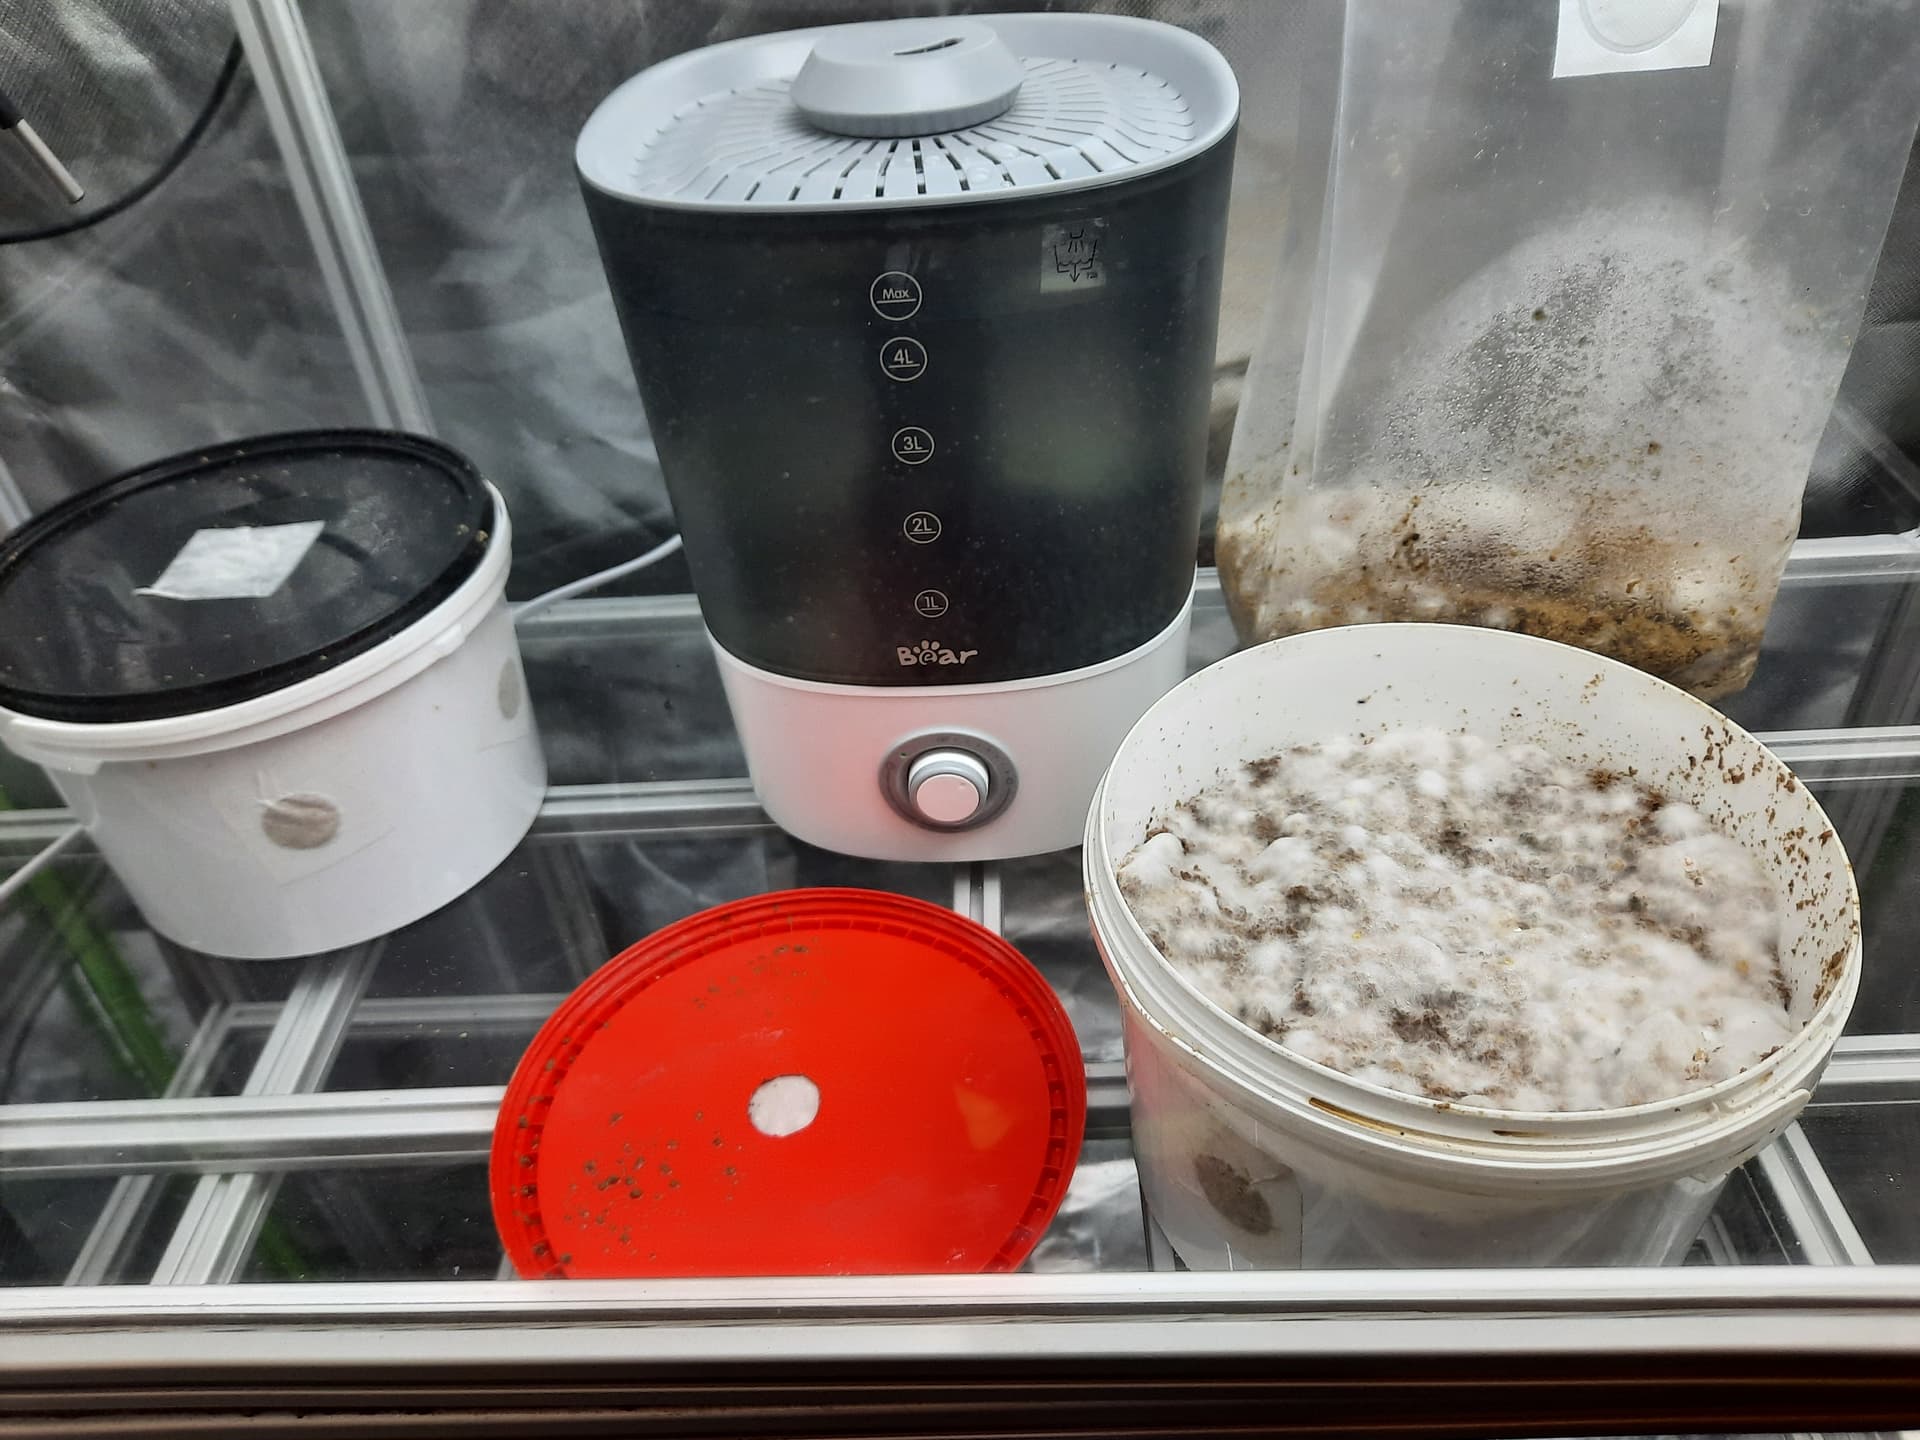
I’m a little confused about the Co2 readings, I’ve got 2 buckets and a bag of sawdust being colonized by grain spawn in there, so there is something in there that is producing Co2, I just don’t understand how it sticks around the 400ppm range for a while and then quickly spikes up to over the venting threshold (which I’ve set at 700ppm I believe)
I also don’t understand why sometimes the humidity PID needs to work the humidifier fairly often, but sometimes it only has to interfere rarely, I expect temperature being the driving factor there.
Let me begin by saying that ‘cost effectiveness’ wasn’t a concern for me, my main concern was having fun during the design,build and operation aspects of the fruiting chamber.
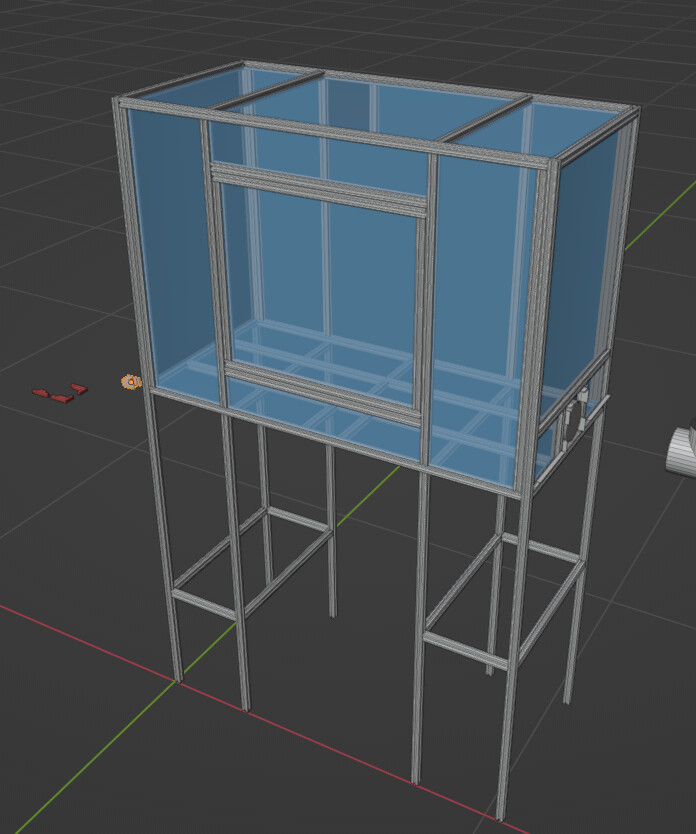
My fruiting chamber is housed inside a120x60x180cm grow tent, but isn’t the grow tent itself.
instead an enclosed space build out of aluminum extrusion, plexiglass and 3d printed parts lives inside the grow tent, I’m hoping having two layers between the fruiting chamber and the attic that the entire build lives in will protect my wood floor from humidity and spores.
I’ve also set aside some room below the fruiting chamber to experiment with aquaponics and algae farming at a later time.
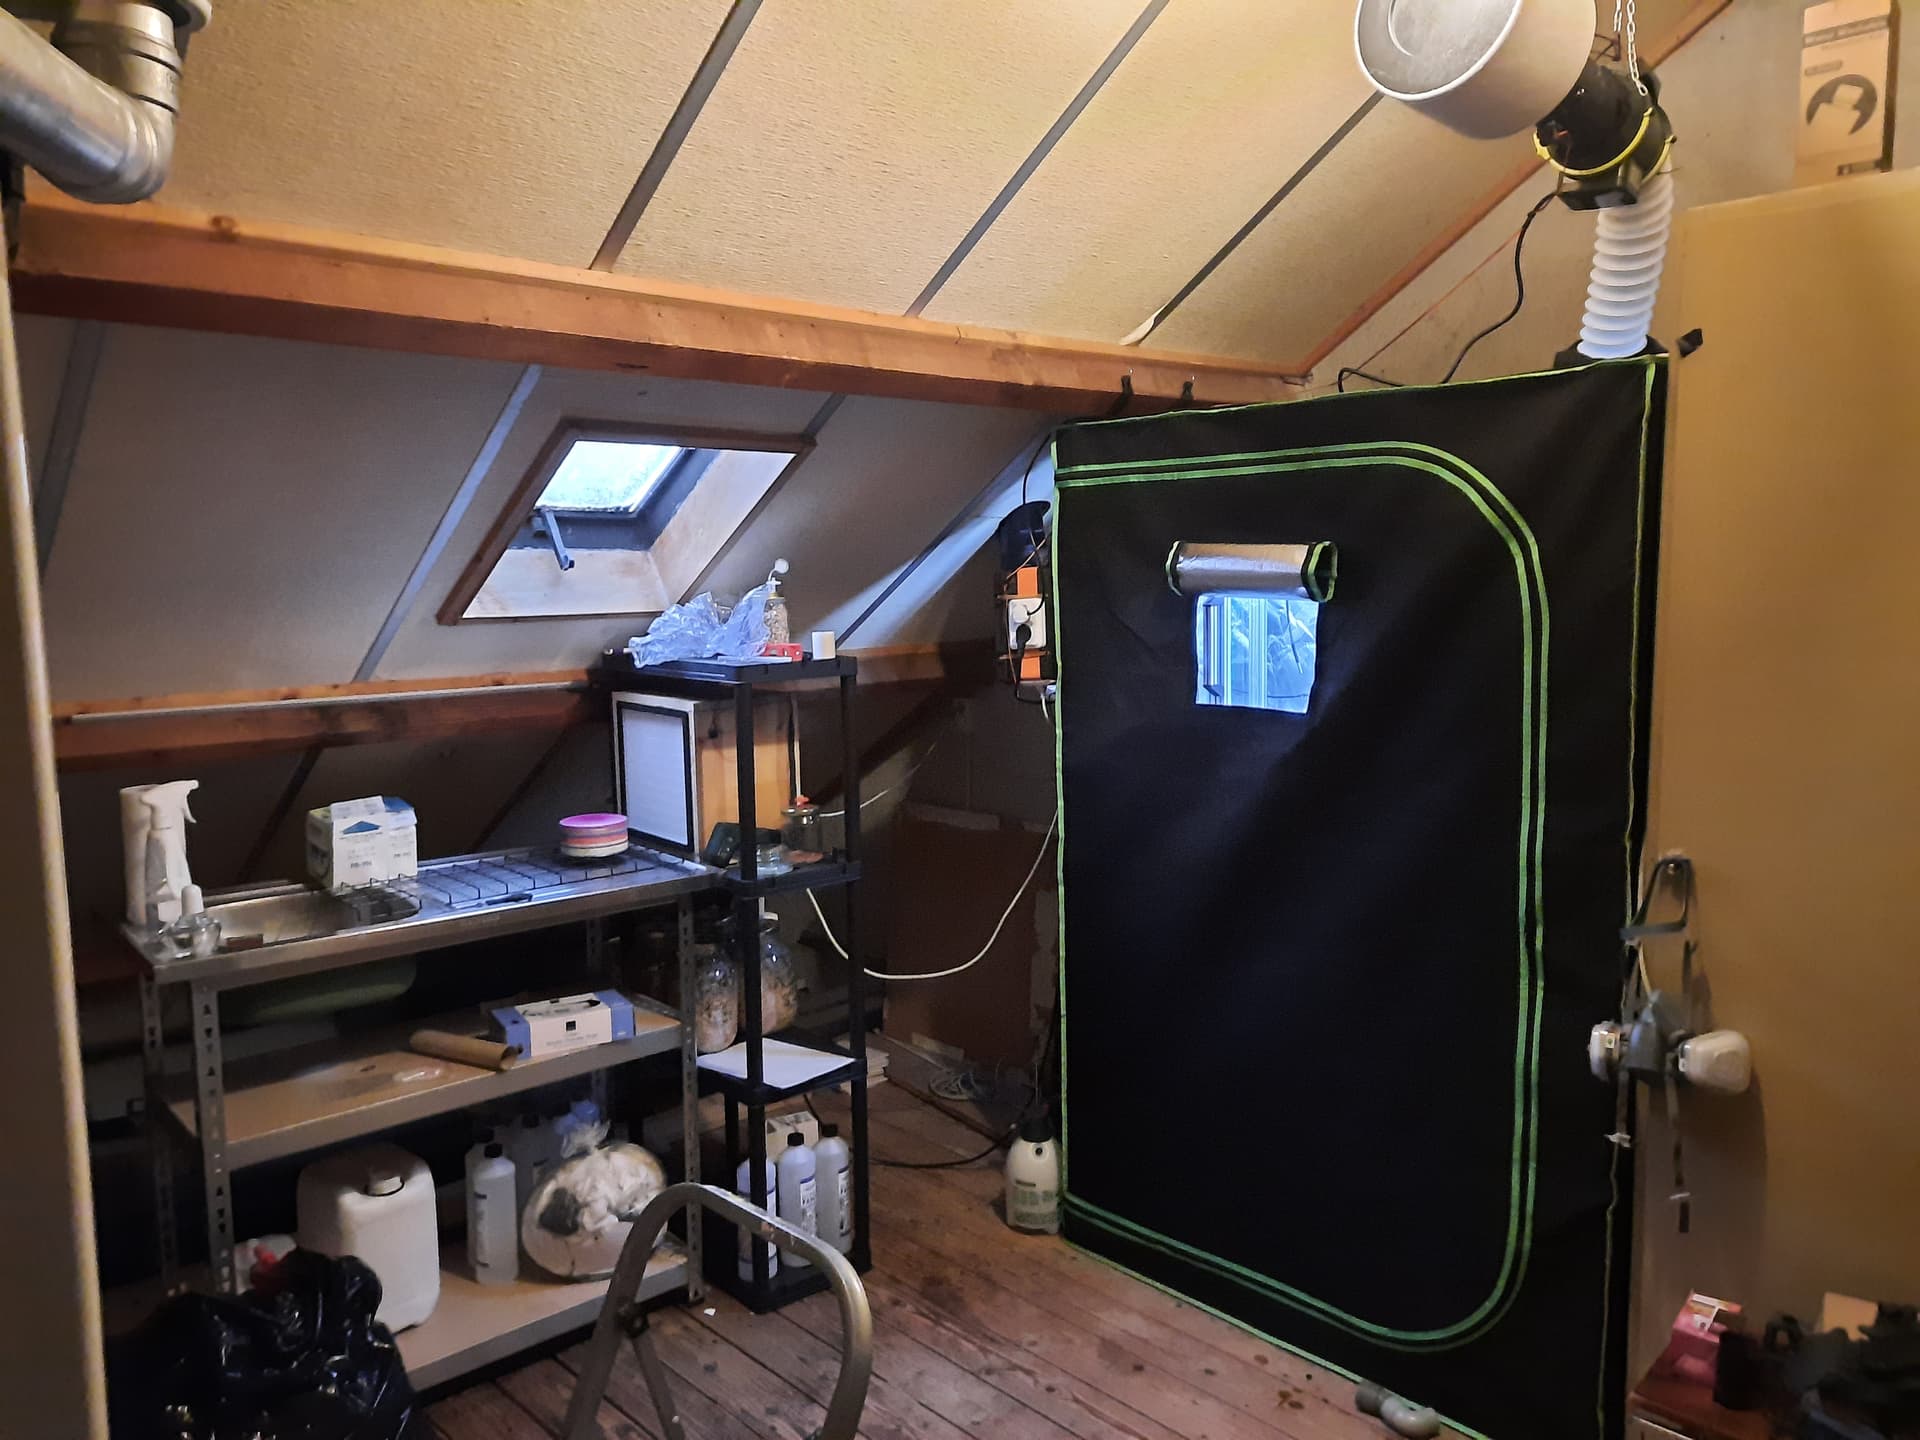
Heres the ‘mushroom lab’ that I’ve setup in the attic, on the right you can see the growtent with the fruiting chamber inside, and on the left you can see my stainless steel sink/workbench. I’ve made a small 30x30 flowhood and I’ve been having success with my Agar work since. (I still need to connect the sink to the jerrycan below via some sort of tube, right now it’s just a spot where I temporarily dump things)
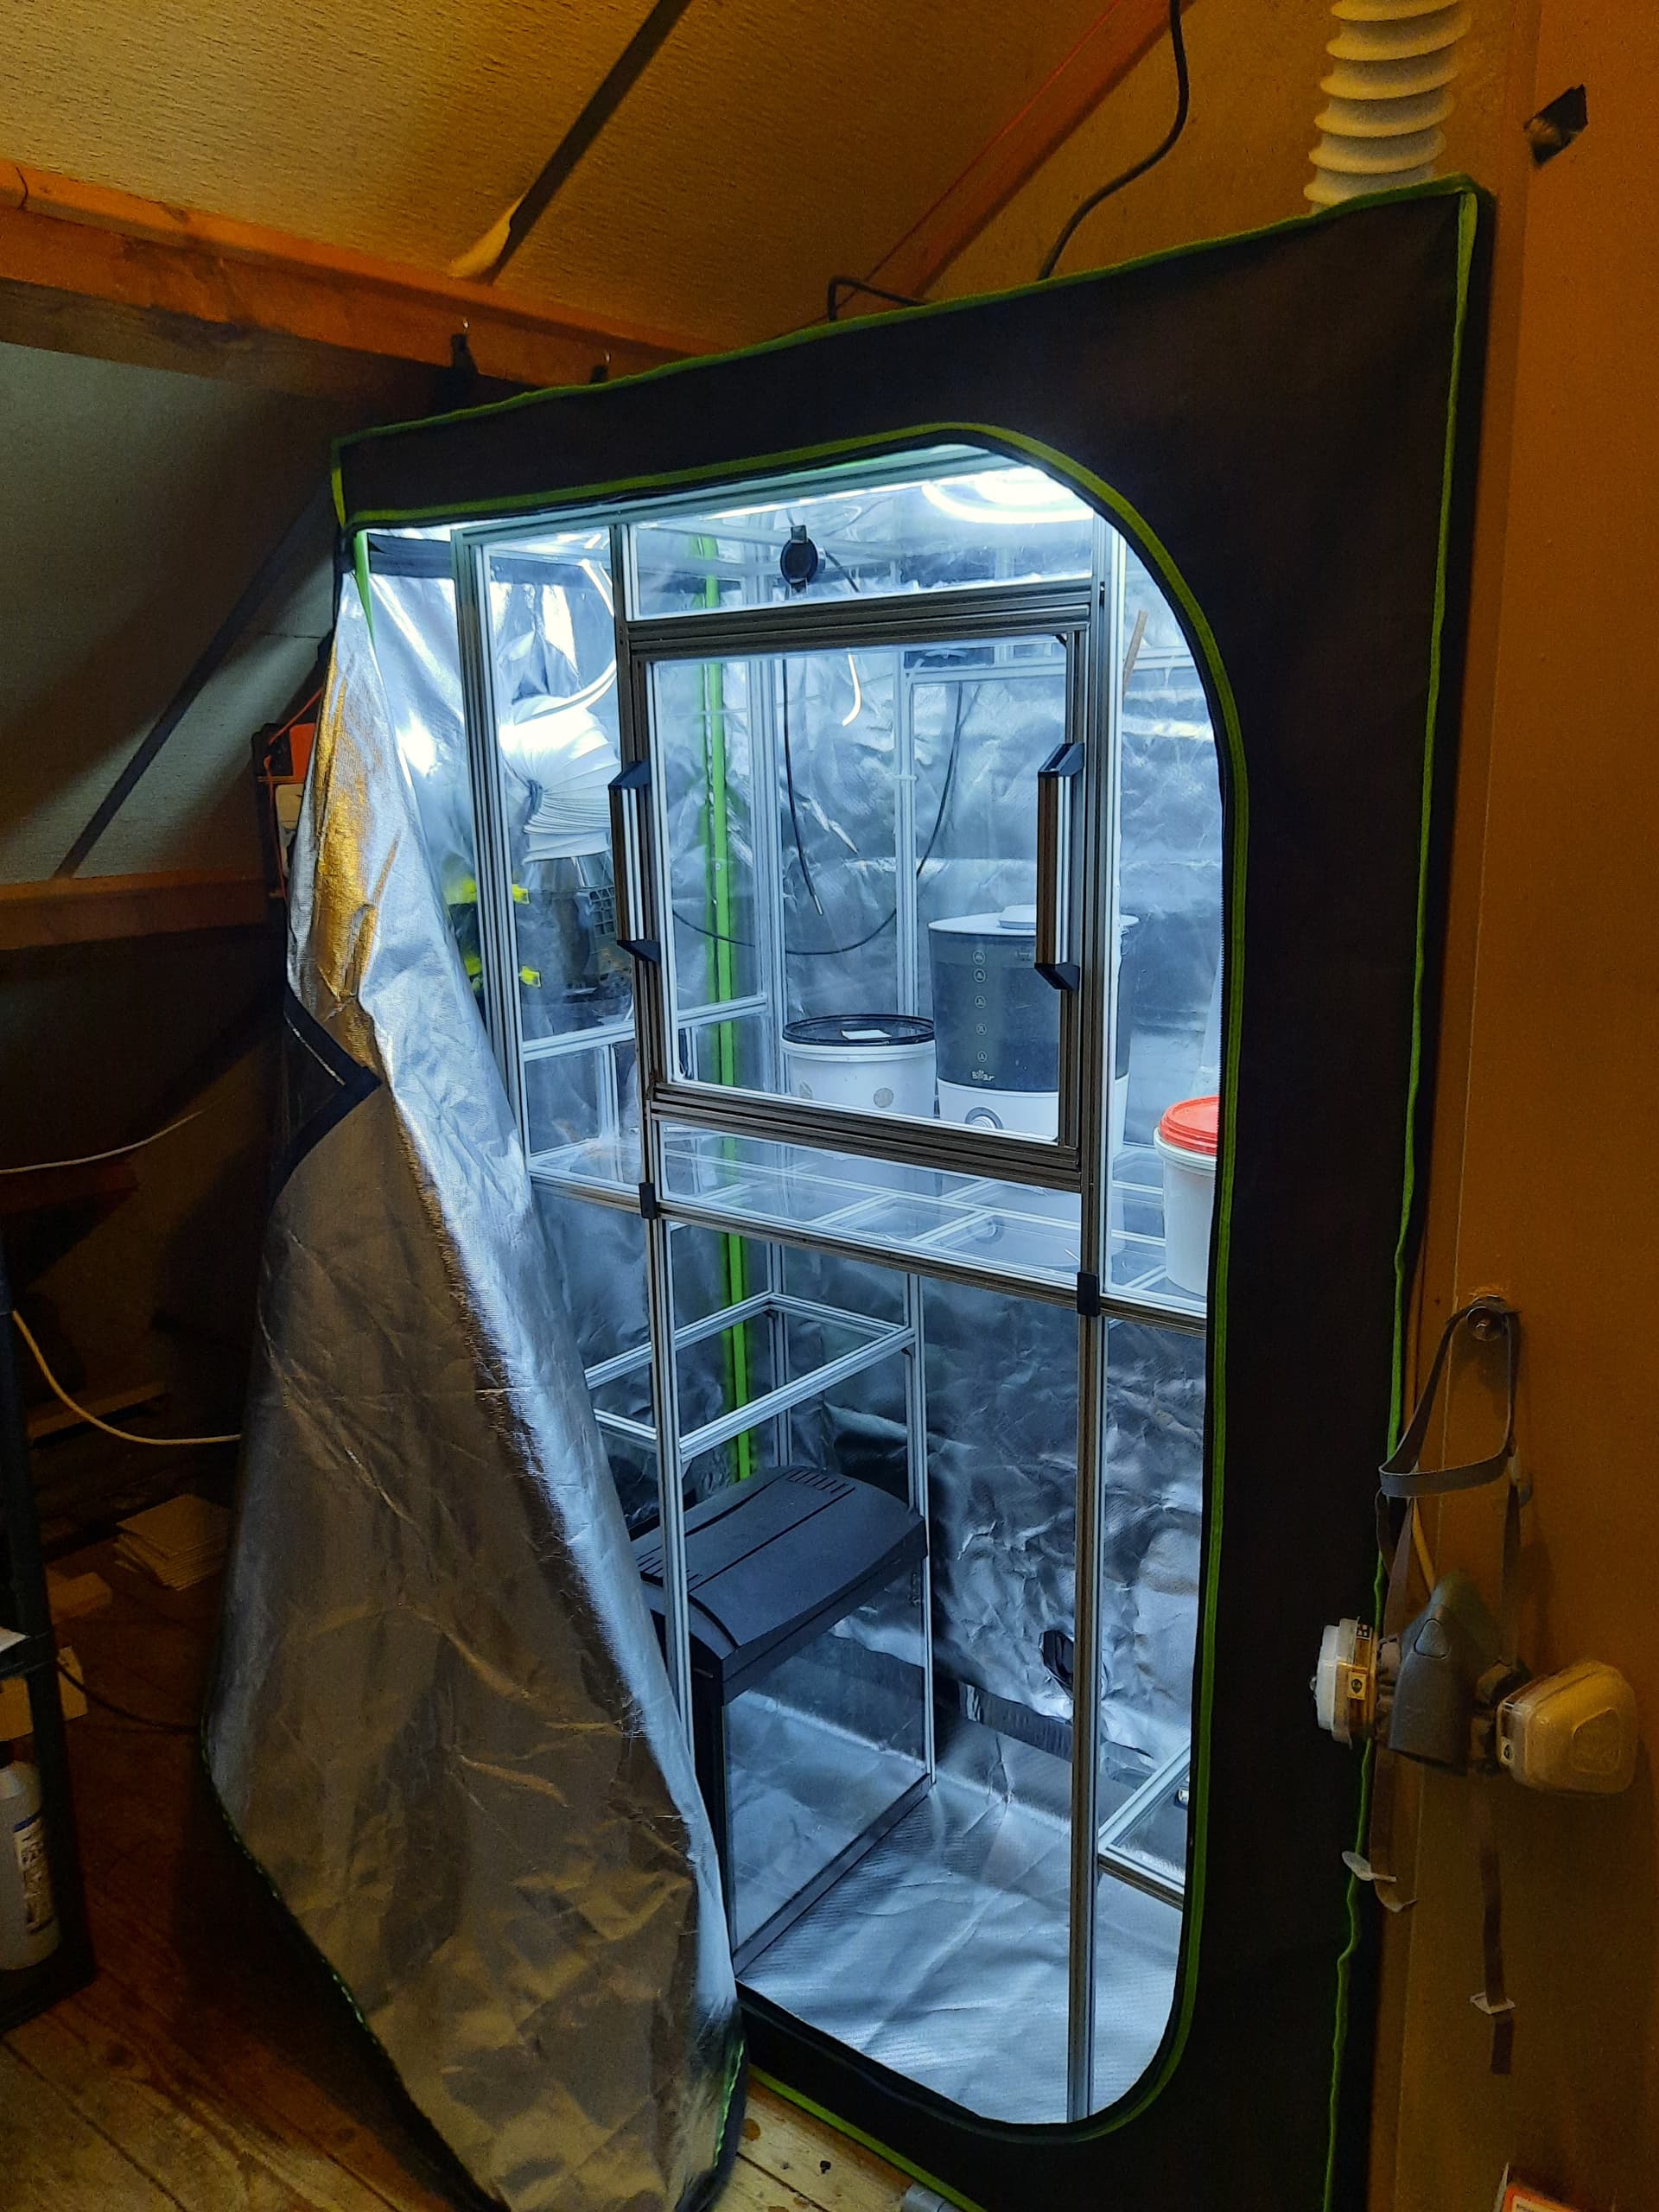
Next we’ve got the grow tent opened up to show off the fruiting chamber made out of aluminum extrusions and plexiglass, Someday I’m going to make an excell sheet and tally all my costs, that’ll be a day that hurts. I’m using a fairly simple 5ltr humidifier as my humidity solution. The resevoir looks like it’ll last a couple of weeks before needing a refill and its just controlled with a relay to its power socket.
All the plexiglass has been sealed with silicone caulking, Theres two 3d printed plate inserts aswell, 1 for the exhaust fan, and 1 to pass the co2 sampling tube and humidity sensor through, Initially I had planned to use both the 3d printed plate inserts for the air exchange cycle, but in practice I found that the 5cm tubing I had designed around restricted airflow toomuch, so I had to improvise a little, The air intake is now a hole drilled in the ceiling instead.
Below the fruiting chamber you can see a small aquarium which someday I hope to turn into the fish habitat for a small aquaponic experiment.
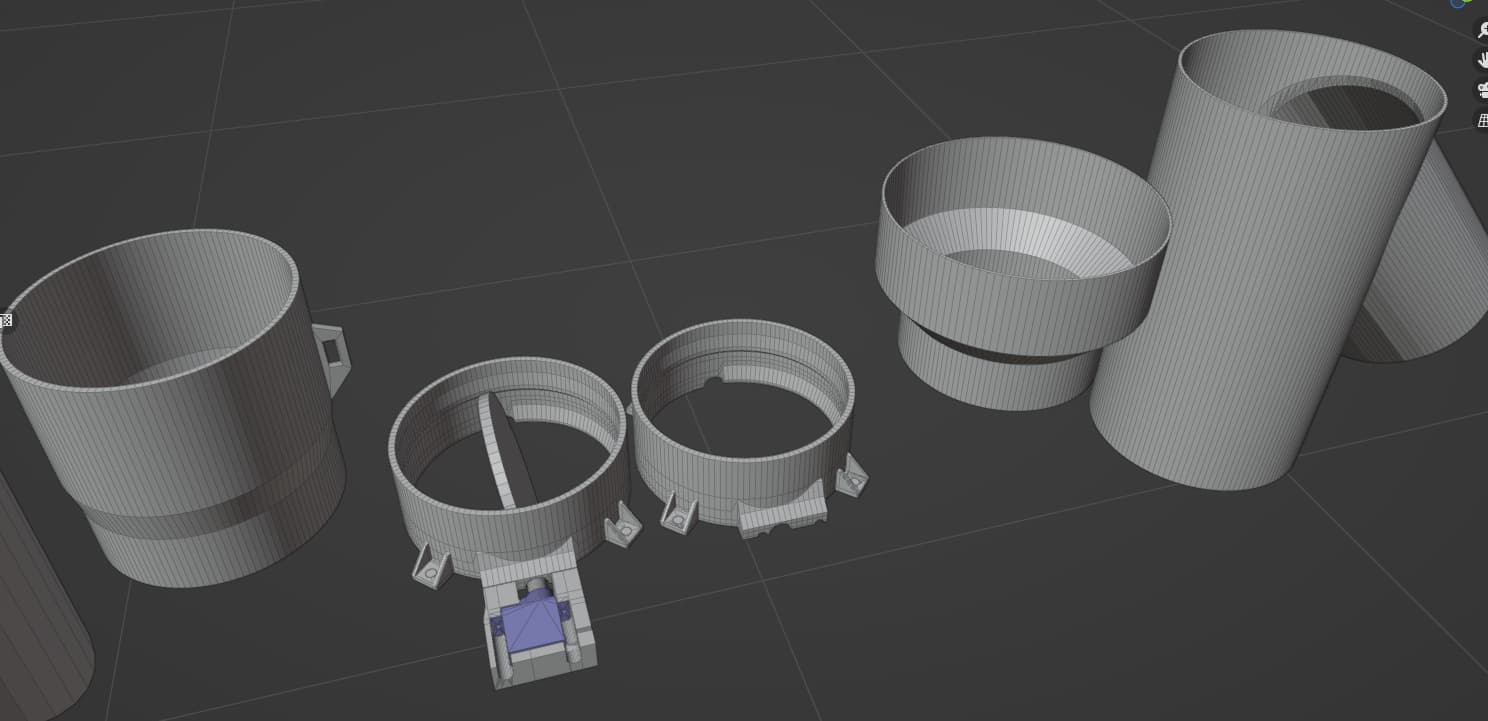
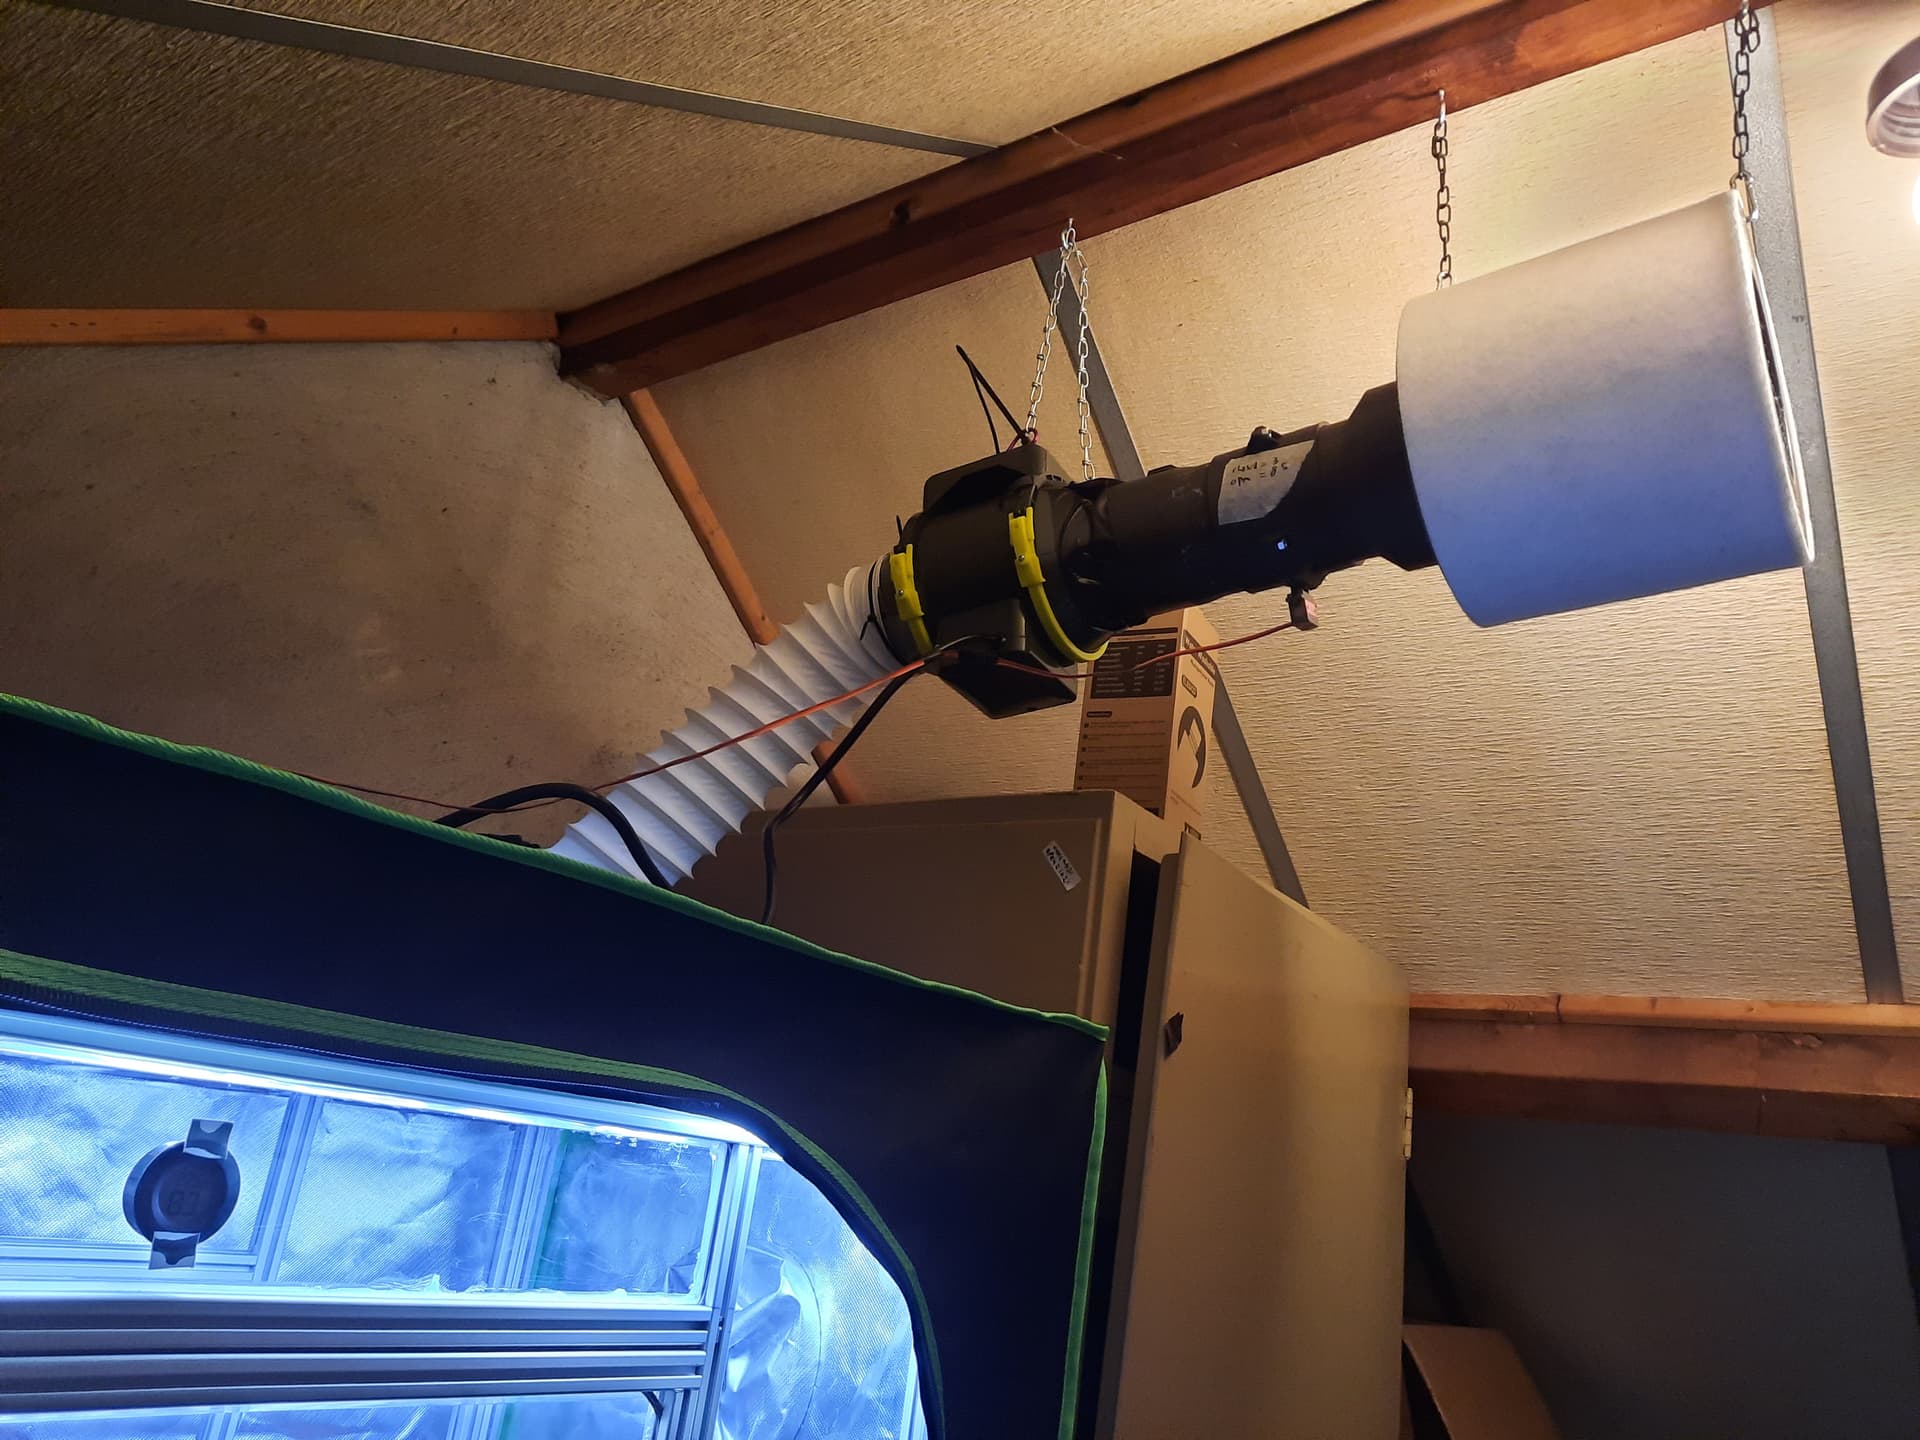
Here you can see the air intake, I screwed some hooks into the ceiling truss and used chains to hold in-place an air filter, butterfly valve and inline fan.
the air filter might be overkill, as I understand the fruiting/colonization phase of mushroom growing isn’t super contamination prone,
Behind the 3d printed butterfly valve, I’ve got this fan. it’s controlled via relay so no fancy PWM speed controls. I’ve got another identical one on the exhaust side. Originally I had smaller ‘bathroom’ type inline fans, but I felt they weren’t strong enough.
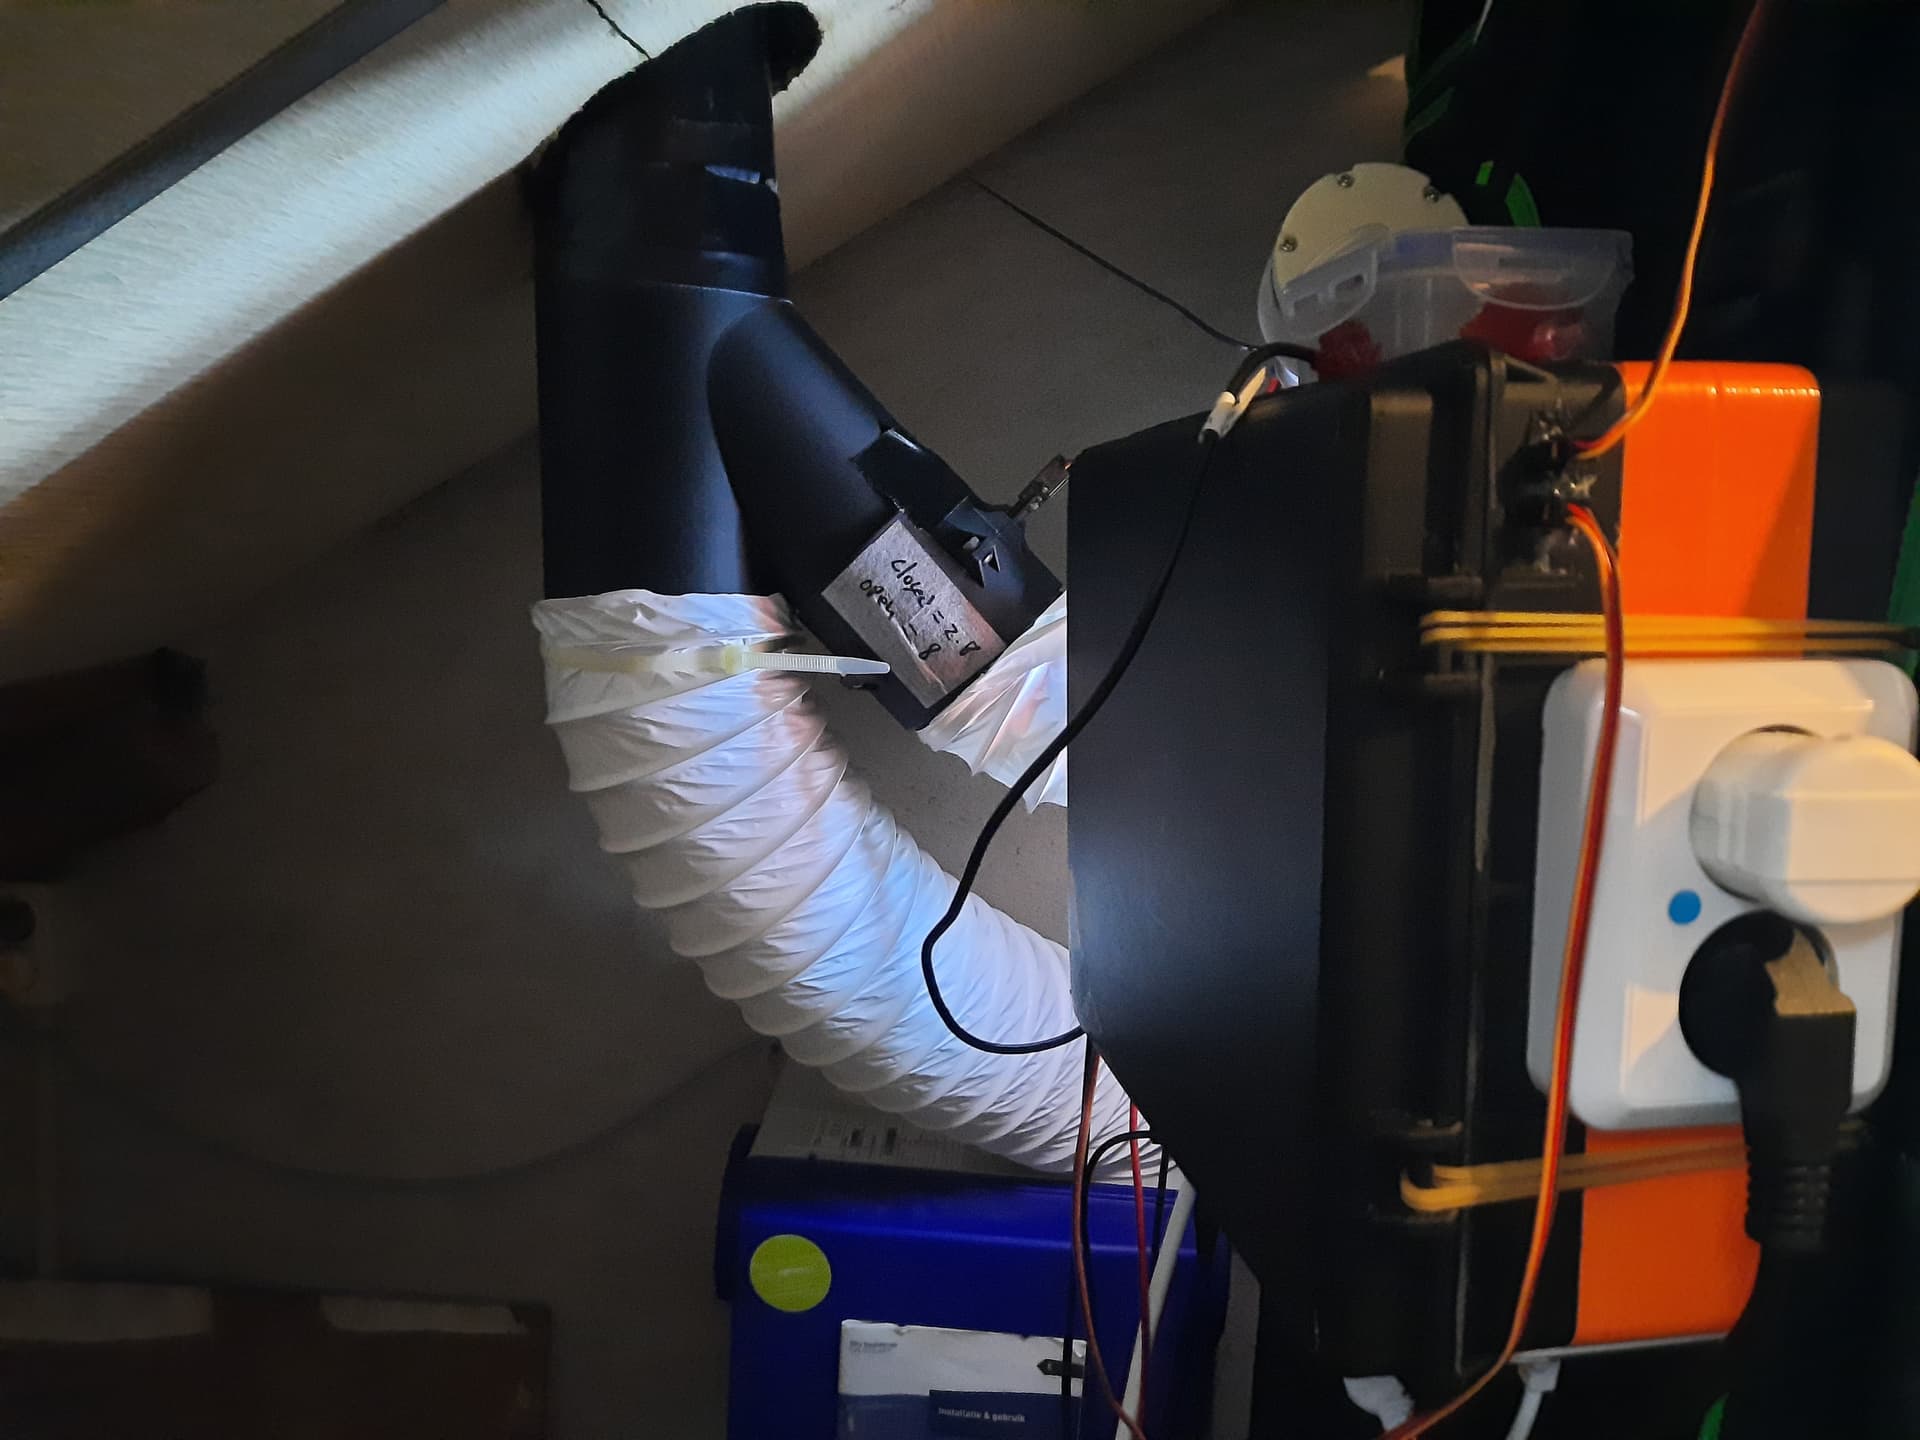
Here we’ve got the control box that houses all the electronics and the exhaust side of the air exchange system. The exhaust shares a chimney with the bathroom below, thats why theres a Y-junction, I was pretty adamant about having butterfly valves in the system and why I needed to beef up the fans to higher power ones. (the bathroom is always venting at a low speed even when not in use so the fan needed to overcome the work the bathroom fan was already doing)
On top of the control box theres a little Tupperware container with two 1 way air check valves, this is where the Co2 sensor lives, a 12V diaphragm pump is used to sample air from the fruiting chamber. This pump is also controlled via relay to the powersocket.
I’ve got 4 power sockets (Red) Co2 pump, (Green) Humidifier, (Yellow) waterproofed lightstrip,(Blue) a double socket for the air exchange fans.
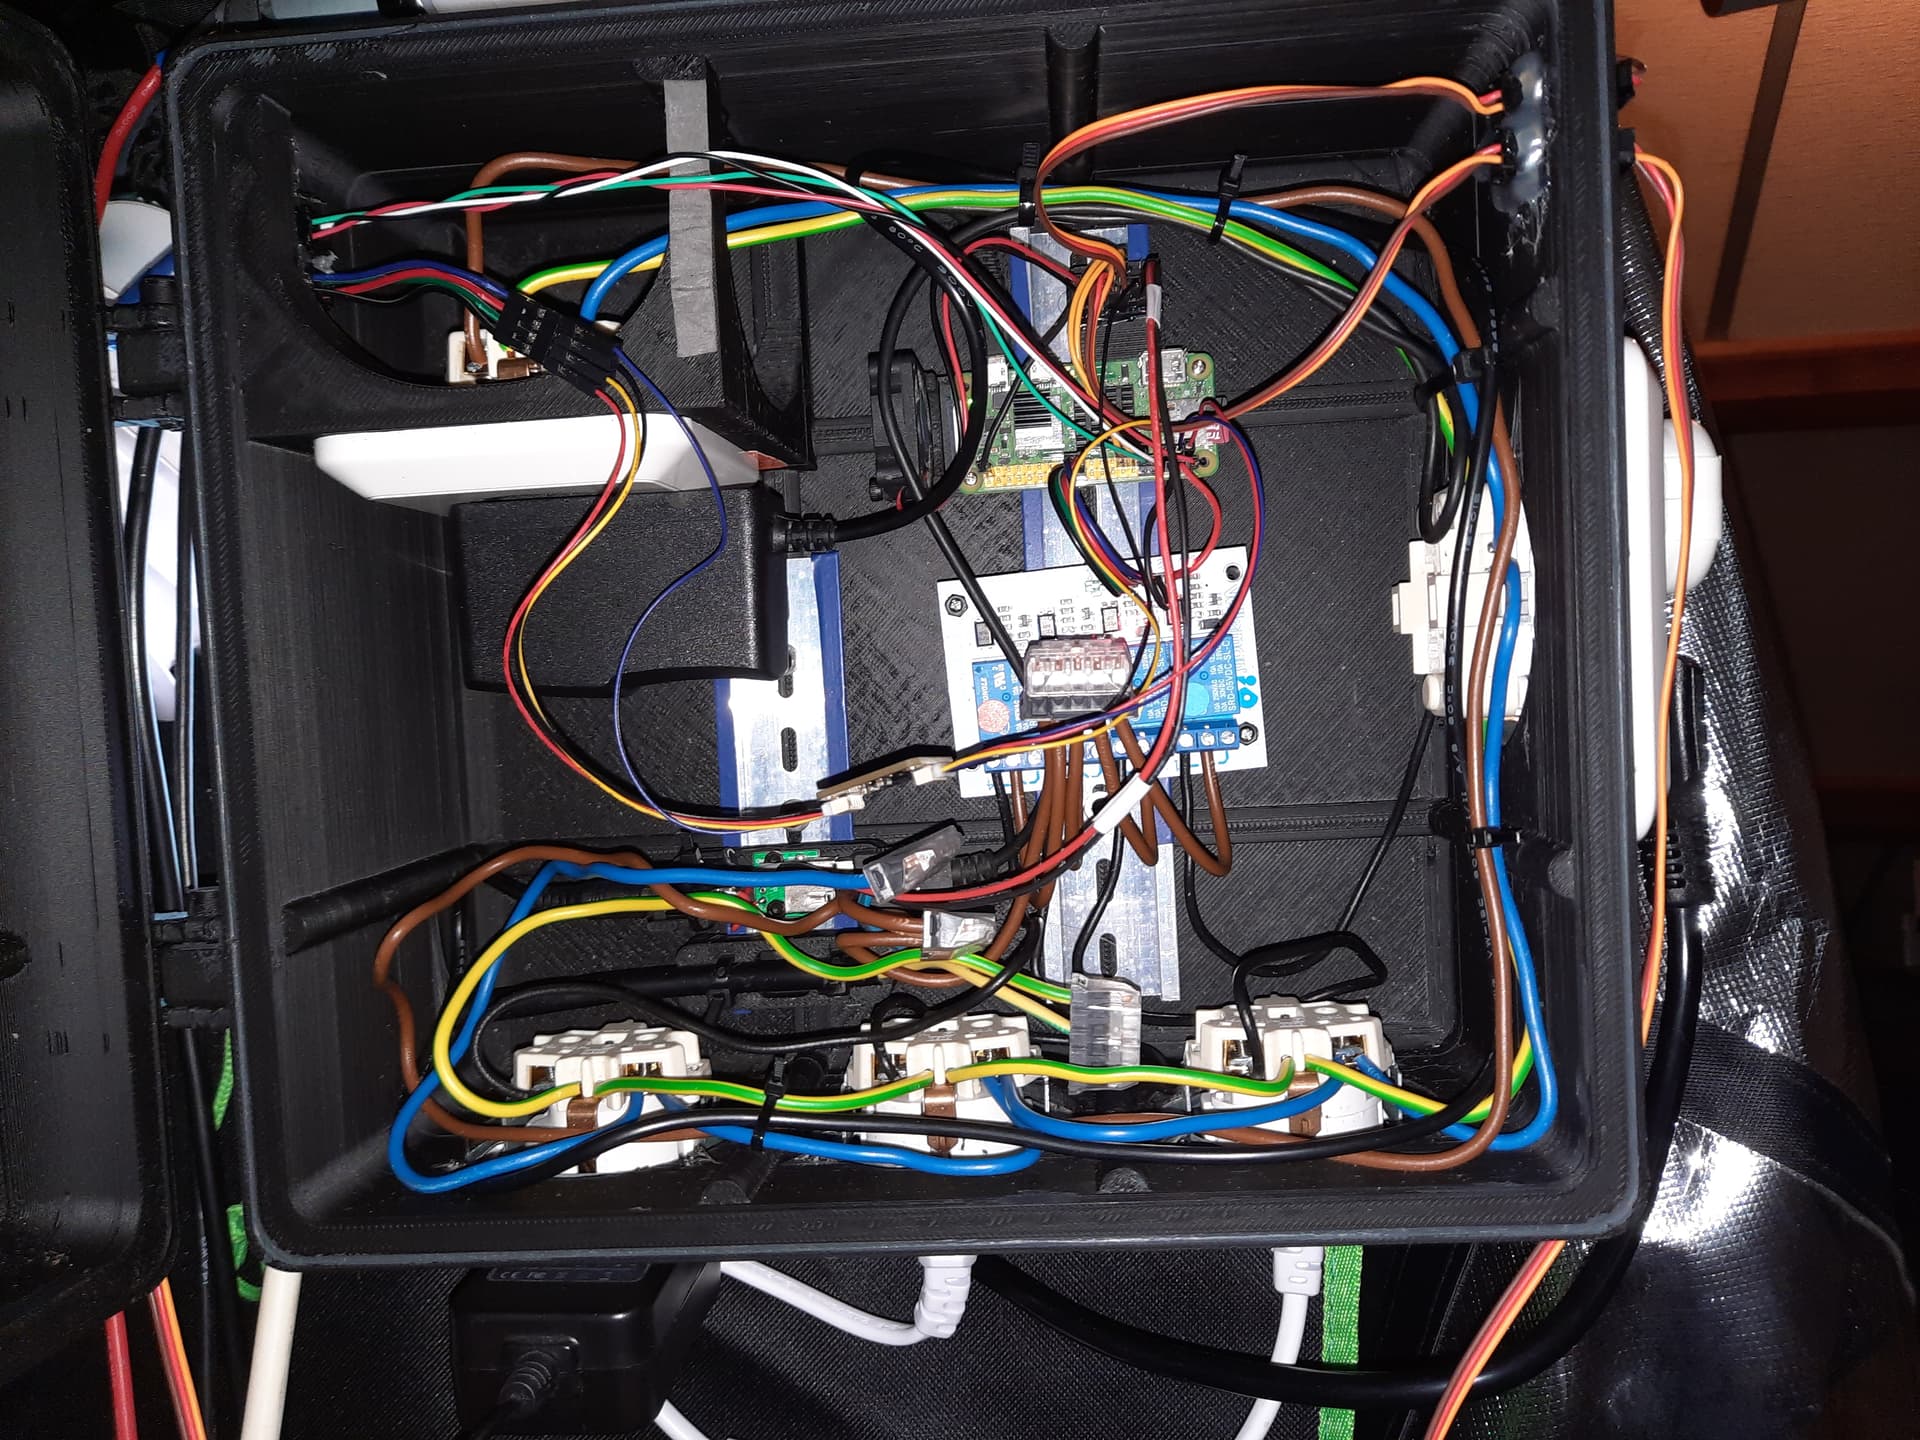
Finally, Here’s the inside of the control box, the entire enclosure is 3d printed. Like I mentioned there are a number of power sockets, 4 of which go to a relay board, and 1 internal power socket to supply power to the electronics.
on the top left there’s some microfit plugs for the sensors and on the top right there’s some microfit plugs for the butterfly valve servos.
I’ve had a ton of fun (and some frustration) getting all of this together. I hope the rest of you can enjoy my write-up!
This looks great! Congratulations on the build and getting everything running. I especially like the 3D printed parts and the exhaust leaving the house. Have you fruited anything in it yet?
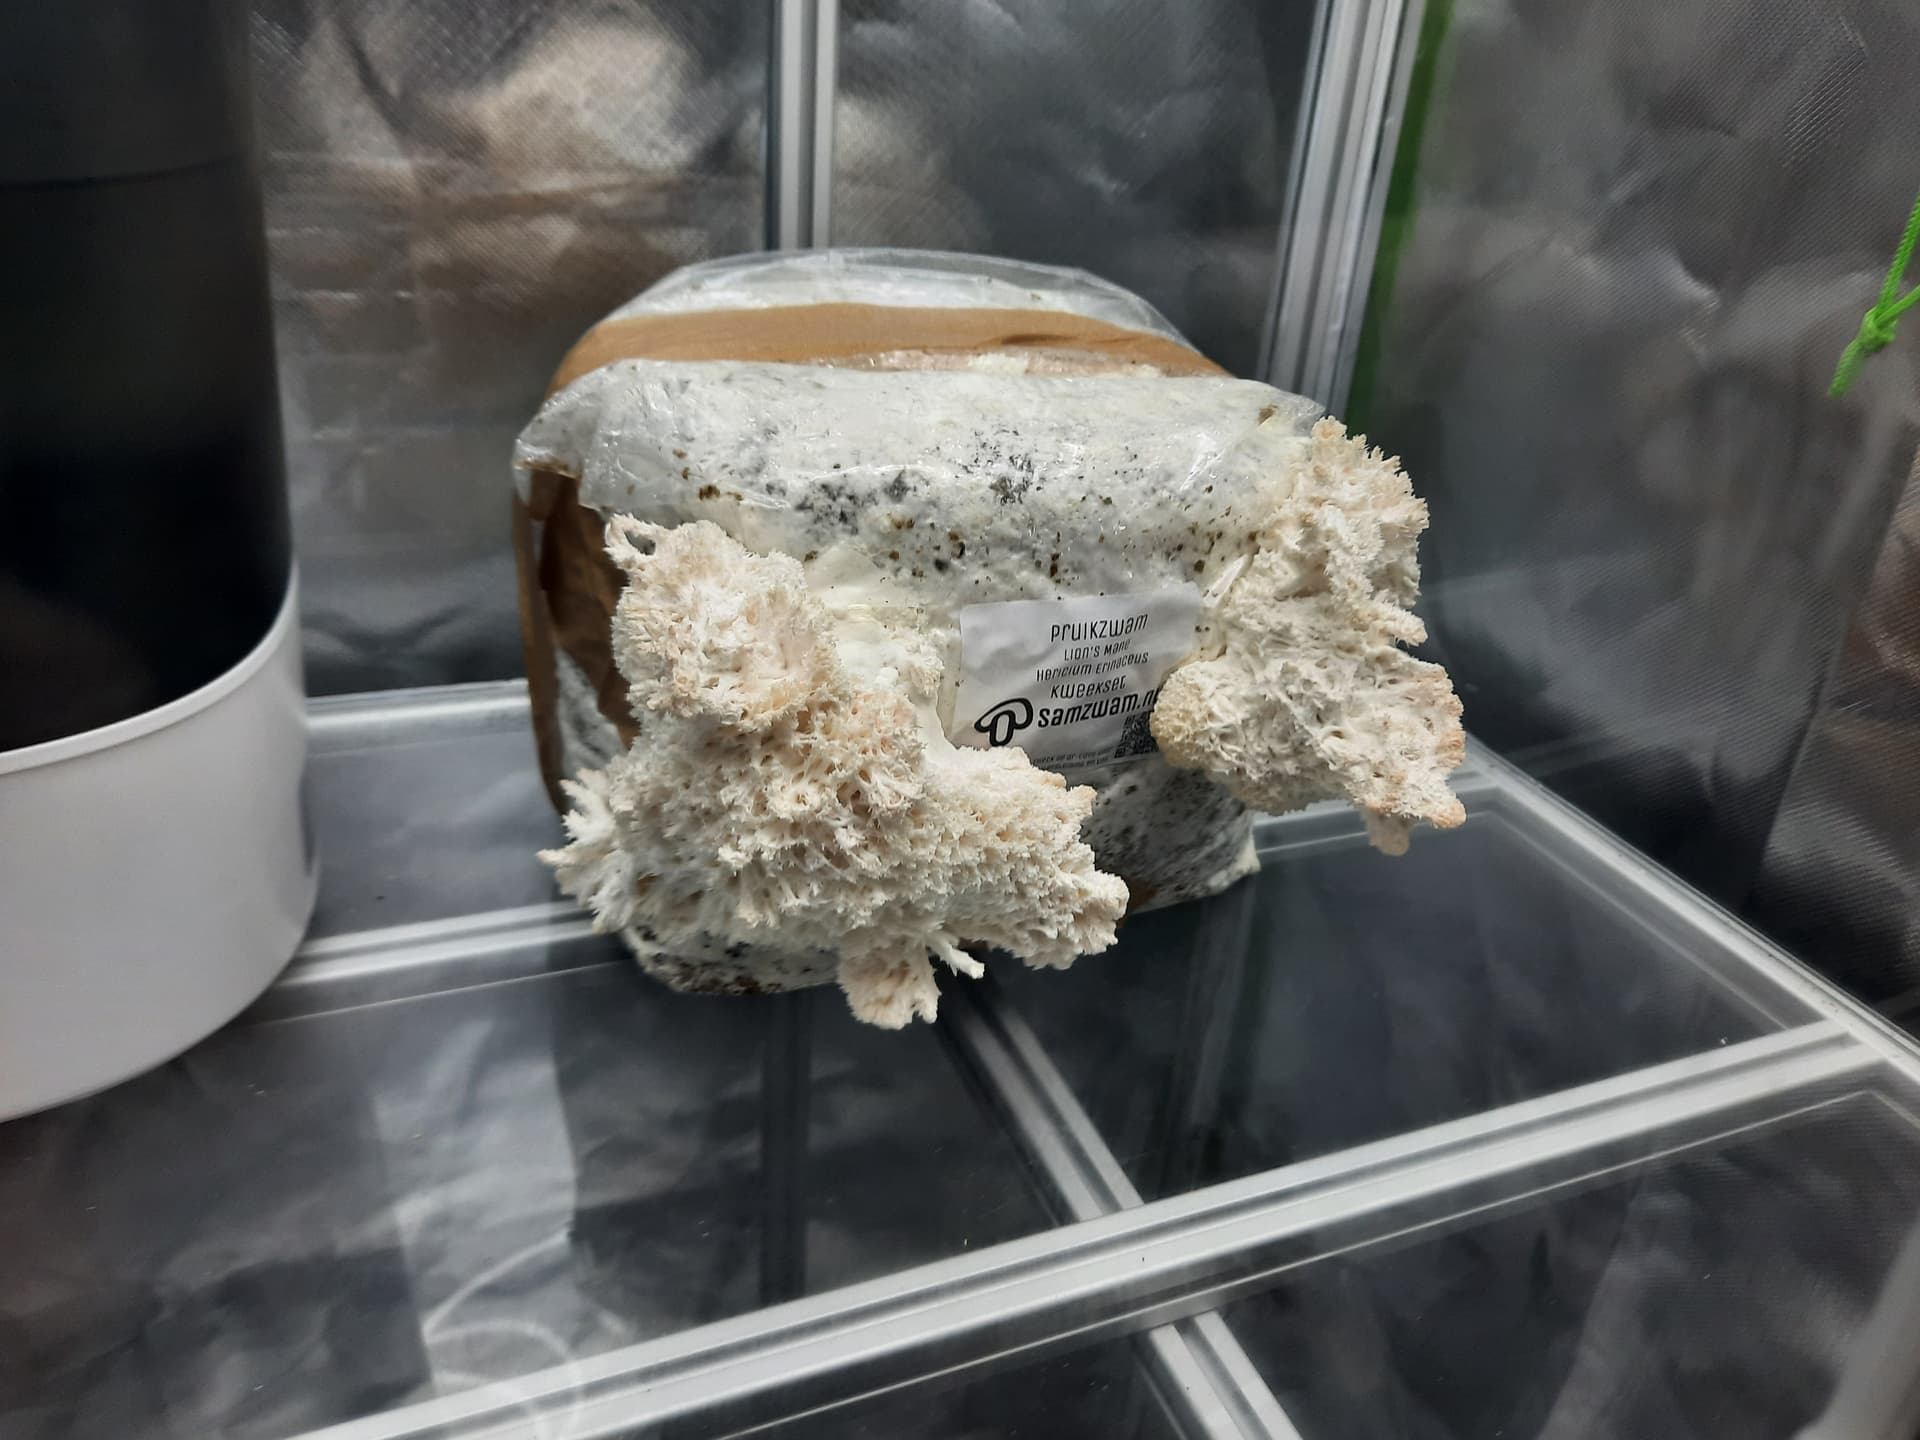
I wasn’t having any success with the mycelium I was cultivating on my own, so I decided to buy a premade block of lions mane substrate. I think the lions mane is looking a little… ‘leggy’? So I’ve adjusted the CO2 cycler to trigger at 600ppm instead of at 700 ppm. hoping for a second flush that is more like the ideal lions mane I see people use on YouTube.
Finally got something to fruit in my fruiting chamber! The plan is to take cuttings from the core of the mushroom to propagate on my Petri dishes, so I can be sure I’ve got some feasible material to work with going forward.
My old stock came from multi-spore syringes that gave me a lot of grief with having to clean them. I’m just not sure if I isolated the correct fungus, and haven’t been able to get anything to grow from them.
(only some white puffball looking things from the king oyster, nothing from that stock of lions mane)
What’s your temperature and humidity? I’d be more concerned that it’s too warm. Lion’s mane likes cold temperatures, like 50 F or 60 F, and high humidity.
The temperature (at least in winter) sits between 64F and 70F (according to the seller of the substrate block, I should be aiming at 64.4F (18C) and 75.2F (24C).
I try to keep humidity high but it needs to compensate fairly often when CO2 gets pumped out.
my humidity is actually a little high compared to what the seller recommends (they recommend 70~80%) My average looks to be around 85%.
edit: oh The spike in temperature between midnight and 3AM is because that is when I run the light. I use it mostly as a means to keep temperature up during the night and I read that mushrooms do need some light. edit2: I should note. that asside from the light strip and venting I don’t have any systems in place to control temperature