Hi, I need some help picking a power monitoring device. I would prefer a “plug and play” solution. I am running Mycodo on an RPI 5. The integrated wifi antenna is planned to be used, but the network ap is a considerable distance so the network quality is questionable. Below are some constraints for the project:
must be compatible with Mycodo
must include two or more monitoring channels
must be $50 or less
prefer a clamp on style current monitor
wired communication is preferred to wireless
Please offer any advice y’all have! The analysis paralysis is setting in!
There’s currently only one supported power monitor input, unless you develop one yourself. There’s also the ability to convert voltage to amps using a number of the supported ADCs that you can connect a current measuring clamp transformer (AC input to DC output), but this approach often does not provide a high degree of accuracy or additional calculations like the power monitor input does (power factor, AC voltage, Watts, kWh, etc.).
This is all DIY development-level hardware and software… even the “plug & play” solutions will require a bit of reading and work on your part.
Instead of having the current-clamp sensor wired directly to the Raspberry Pi, you could use a $5 ESP32 dev-kit board with the clamp-type sensor connected to it and then run Tasmota on the ESP32. Tasmota is compatible with Mycodo when using Mycodo’s MQTT inputs. Basically you are using the ESP32 to build a WiFi sensor node that sends it’s data to the Pi running Mycodo via WiFi using the MQTT protocol. I have many ESP32s with several types of sensors all over my property sending data to my Mycodo setup and they work very reliably.
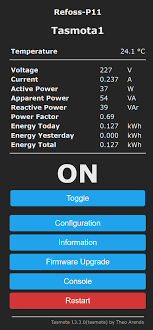
Tasmota also has it’s own built-in web interface so you can use it as a stand-alone sensor to directly monitor your power without the need for an R-Pi and Mycodo.
There are also many power-monitoring smart-plugs that can be flashed with Tasmota if you are looking for a more manufactured and clean “plug & play” solution.
The ESP32 WiFi has good range and is very reliable for simple MQTT data packets.
The ESP32 has it’s own built-in 8-channel 12-bit ADC and when running Tasmota is compatible with far more power monitoring devices than the R-Pi running Mycodo.
The ESP32 also uses about 0.2 amps vs the R-Pi’s 2-3 amps so it’s very easy to run the ESP on a small solar panel and battery if you need it in a remote location… the ESP can also be put into deep-sleep mode that only uses <0.005 amps so it makes it easier to run it off a battery if you only need to wake it up and send data once in a while instead of the device always drawing full power.
Thank you for your responses! They have been very helpful. Jason, I really like the esp32 route. I like the simplicity and integration into Mycodo. I’ll need to read up on the recommended components to buy for the power monitor. Any recommendations on what to get/not would be greatly appreciated.
So if you’re serious about using the ESP32 and Tasmota, just be aware that there is nothing really “plug & play” about it… it involves a bit of a learning curve since Tasmota is a very feature-rich piece of software, with a lot of settings that all need to be set manually to get the most out of whatever scenario you are working with. There is also sometimes the need for some basic electronic circuit building. However, there is plenty of excellent documentation, and once you learn the basics, it is truly an indispensable thing to know if you are working with any kind of IoT-based home automation & monitoring. And because Tasmota uses MQTT for data transfer, it is very compatible with many home automation apps like Home Assistant, Node Red, Mycodo, etc.
I highly recommend joining the Tasmota Discord server for asking questions about everything Tasmota. Here’s an invite link, let me know if it doesn’t work.
Tasmota does not store or graph long-term data because there isn’t much memory on an ESP32. If you need to graph data or keep a long-term log of your data you will need to use a home automation app like Mycodo. That means you will also have to setup Mosquitto MQTT Broker (server) on a Raspberry Pi… you can set it up on it’s own Pi, or you can set it up on the same Pi that is running Mycodo since it doesn’t use much system resources. You just need to have it on a Pi that is running all the time since it will handle all communications between Tasmota and Mycodo. Here is Kyle’s tutorial on setting up Mosquitto on the Mycodo Pi…
Understood. Perhaps my ignorance is showing, but would a Tasmota flashed device like a Shelly EM or Athom EM2 Energy Meter work in place of the ESP32? Would there be a reason why I couldn’t still use MQTT for data transfer the only difference being I would be using prebuilt hardware rather than building it from scratch and configuring Tasmota on the ESP32? Thank you for the the Discord server link. I think it will be a great resource in the near future.
There are also many products that come with Tasmota firmware pre-installed from the factory… I’m not sure how current or well maintained this list is, and most of it is for EU products, but you can always ask about hardware in the Discord.
If you have access to Amazon, you can also search there for “Tasmota power monitor” and a lot of “Tasmota compatible” products come up.